Tuesday, April 16, 2013

Back from hiatus...for real this time

Although I had stopped blogging, I have not stopped crafting. Enjoy this picture of my fingernails while I get my blogging act back together!

Friday, March 25, 2011

I'm back!

And I've created lip scrub! What is lip scrub, you may ask, and why is it necessary for my life? Well, I'm going to tell you, so sit tight. Lips are pretty useful, right? I don't think anyone's going to argue with me there. But alas, lips have one fatal downfall: dry, flaky lipskin. But never fear, I have your katana of cosmetics!

So here goes. The super complicated instruction section.
First, track down all these ingredients. I'll wait.

Pictured here:
Sugar - this is the most important ingredient. This will serve as the scrubbies in your scrub. If you don't have any sugar...well, I guess you could use sand. I don't think I'd recommend it though. So yeah, find some sugar.
Vitamin E oil - if you don't have any of this, you can substitute with olive or even canola oil.
Honey - overall good for your skin. Also, delicious.
Vanilla - just for taste. Completely optional.
Essential oils - Also totally optional. I used sweet orange oil to energize it a bit, but you can throw in whatever you want!

Got it? Excellent! Now mix them all together in a vessel of your choosing until you have something resembling this:

And...that's it. Take a pinch between your fingers and scrub it all over your lips. Scrub it some more. When you've scrubbed all you can scrub, rinse it off. Finish off with any lip balm of your choosing. Feel the softness? Now you're ready to take on all your lip-related duties with confidence!

Monday, July 12, 2010

Check out my semi-failed craft-a-day project!

Sometimes, I undertake a project that proves to be too great for my abilities. The craft-a-day summer was one such undertaking. I made some cool stuff, but in the end wasn't able to keep up my crafty momentum. However, you can check out the things I did make at gabriellescraftaday.blogspot.com. I'll be blogging here from now on, hopefully more often than my previous record!

Toodles for now, bleeps! :)

Friday, June 11, 2010

Hamburger cake


So, many of you probably remember my boyfriend's birthday dragon cake from last year (especially since it was only a few updates ago). This year, I knew I had to do something equally as awesome. I thought long and hard about this one, and finally came to a conclusion. What's the one thing that the boy could possibly like more than cake? The answer should have been obvious...

Hamburger, of course! This was kind of a rushed job, so I'm not 100% happy with it, but it definitely got the job done. The 'buns' are made from a simple whiskey yellow cake recipe, and the inside is a brownie. The frosting is a simple buttercream. I dyed all the frosting using a handy box of Wilton's Gel Food Coloring. The red and green didn't get as bright as I would have liked them, even with the gel coloring.

I'm still getting the hang of gel food coloring as opposed to the bottled kind...I used up more than my fair share of toothpicks in the process!

Monday, June 15, 2009

Fun with resin!

First off, let me say, playing with resin is very very fun. But also, very very dangerous. So if you try this, be very very careful. Make sure to do it in a really well-ventilated area (I did mine outside), and preferably wearing gloves. This is stuff you do not want on your hands.

That being said, let's get into the fun part.

A while ago, I bought a package of Castin' Craft EZ Cast Epoxy Resin. It comes with two bottles: the resin, and the hardener. Unlike other resins, which require measuring a ratio of resin to hardener, EZ Cast makes life, well, EZer. It's a 1/1 ratio. Simple enough. If you're using the same cup to measure, make sure you wash it out reeeally well in between, though. Otherwise it'll gunk up and just be overall not very fun. I've also read that it's better to clean the cup out with rubbing alcohol instead of water to prevent gunking, but unfortunately I read this afterwards, so I haven't tried it yet. Once you've mixed, keep mixing. And mixing and mixing and mixing. Let it sit for a while until the bubbles settle. Then mix some more. Then let sit. I recommend using popsicle sticks for mixing, because you're going to need to throw them away after.


After you're all mixed up, it's time for the real fun part. First, you're going to need a mold. I've been using a Castin' Craft one with a lot of pendant designs in it, and it's been working really well for me. I've read that you should get mold release/conditioner, but I've been doing fine without it. If you're using any kind of mold that wasn't specifically made for resin (ice cube trays, candy molds), you should definitely invest in some, though.

Yeah, that's the one.

You can also buy resin colorants. They sell them in most craft stores. You only really need a few drops per batch, so they last a long time!

Now, pick out some objects. You can use toys, clay figurines, coins, teeth, glitter, stickers, leaves, flowers, food, broken jewelry...to name a few. Your imagination is the only limit! (And the size of the mold, I suppose). Mix up your colors (if you so choose), pour into the molds, and sink in your objects!

And now, we play the waiting game. This kind of resin takes about 24-48 hours to cure completely. Try popping it out of the mold after 24. If it doesn't come out with a bit of pressure, it's not done yet. Wait another few hours. Try again. Become impatient. Try again every few hours until they pop out. Squeal in glee.

I know you're all waiting with bated breath, so without further adieu (ado?)...my finished products!


Close up on my favorites:


Long story short, resin may be one of my new favorite crafty adventures, and I plan on taking full advantage of the temporary nice weather to get as much toxic chemical crafting in as possible!

Monday, May 25, 2009

Playing with caustic chemicals and molten wax!

Today I embarked on one of the most exciting crafty adventures I've experienced in a long time! This is an idea I've been toying with for the last few days, and thanks to a 50% off coupon to AC Moore, I was finally able to bring it to fruition.

A while back, I got some glass etching cream, and have been itching to try it ever since. The other day, I got the idea to combine it with another craft I've been wanting to try: candle making.

This is the glass etching cream. Basically, you make a pattern out of contact paper or something similar, stick it on your glass, and smear the cream all over it. Leave it on for 5-10 minutes (I had to do it twice because it wasn't as noticeable as I wanted it the first time), and wash it all off. I should probably mention, glass etching cream is EXTREMELY CAUSTIC, so you should be SUPER DUPER CAREFUL when handling it. Wear plastic gloves if you have them. I didn't use any because my glass had a handle to hold onto, but I made my brother wrap his hands in plastic bags. Because he's clumsy. Sorry no pictures of this part, I need a little bit of practice with this whole 'photoblogging' thing.

My brother made his own candle too. I introduce him to the coolest hobbies. ^_^

Makeshift double-boiler. A lot of sites recommend two pots, but I like doing it this way because then you have the added convenience of a spout! The only annoying part is holding onto the handle to make sure water doesn't get in. (Use pot holders!)

More supplies! Buttload o' wax and chunks o' color.

Around here is where I'm kicking myself for not taking a picture of the holder pre-wax. It looked pretty awesome.

Closer shot where you can see the skyline (a little) better.

My brother's finished product...the logo for his baseball team (Pirates)


Conclusion for today: caustic and molten things make for fun times!
In retrospect: I read that pre-heating the glass container reduces the number of bubbles in your finished piece. Which is good, because my candle is very bubbly. :( Also, I think next time I'm going to make a votive in the handy little metal mold provided by the kit I bought, then put it in the votive holder. That way, you'll still be able to see the nifty design on the canister.

Tuesday, May 5, 2009

The most epic earrings I've ever made, and pickled hair follicles

Those right there are several hours of work. Per earring. In retrospect, now that I know how they work and don't have to keep checking back on the instructions, I could probably get them done a bit quicker. But, should you decide to attempt these earrings, be warned: they WILL be time consuming. These are also the only article of jewelry I have made directly from a pattern. I got it from this book, which the boyfriend gave me for my birthday this year:


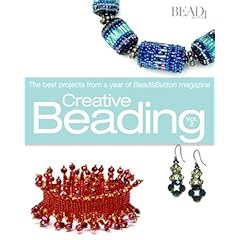
I'd just like to say, I highly recommend this book for anyone who is interested in jewelry making. It's full of awesome ideas, and the instructions are super clear. They also tell you not only what to use, but where you can buy the materials you need.

I'm not sure exactly about the legality of posting the entire tutorial from the book on the internet, but the earrings are essentially a whole lot of dead soft wire wrapped around a coil of half-hard. The Swarovski beads (I love Swarovskis) sparkle in the light and just look great with the silver wire.

Over the weekend, someone found out that I make jewelry and asked me if I had beads lying around my room. I told her she had NO IDEA. I've found beads in places you wouldn't imagine...like my shoes, my trumpet case, and my underwear drawer.


Also, this is unrelated, but today I learned that rinsing your hair with vinegar is supposed to make it look healthier, shinier, and fuller. So, before I showered today I filled a bottle with half regular white vinegar, half water, and a little too much spearmint essential oil. After shampooing and conditioning, I poured some into my hair and let it sit for a few minutes before rinsing it out. My hair doesn't look so much different yet, but I do smell faintly of some strange combination of vinegar, mint, and cloves (the only essential oils I had on hand...) And my scalp tingles a little, but in a good way. It feels cleaner, actually. But that might just be the mint. I'll keep you all posted on my experiment!

I have a 50% off coupon to AC Moore that I think I'm going to use on a soap making kit (one craft I've wanted to get into lately). Ohh the possibilities!